|
|
|
Who's Online
There currently are 5732 guests and
3 members online. |
|
Categories
|
|
Information
|
|
Featured Product
|
|
|
 |
|
|
There are currently no product reviews.
 ;
Thank you for your manual It has the basic things to and i use the Oszi for Longer Time.
THX
;
Actually, I was looking for this information for 3 years!...now thanks to you, the manual is on my hands and of great help, cause I understand now where I was doing wrong connections and wires...excellent, I'll be back to you if in need, thank you.
 ;
This manual covers the main equipment features only. While it also includes the procedure for saving and loading from the now long obsolete memory cards it does not mention the how to operate with the optional floppy drive interface so I am still at a loss about how to use this! Note that there is a separate manual covering the MIDI interface and programming via the keyboard, not included in this download. You will also need to get hold of this if you want to use the MIDI interface properly. Basically there is little difference between this manual and the free to download manual for the similar PR60 model.
;
Good list of manuals. I found a very rare one and easily get. Should be promptly to download, as we must to wait hours even after confirmed payment.
;
The manual was properly scanned and perfectly readable. The only small problem is that I couldn't use my dear Ctrl + F to find a word I needed.
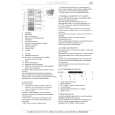
Clock/Timer
Press à or á on the system to set the hour for the timer to start. 4 Press à or ë on the system to set the minute for the timer to start. 5 Press CLOCK�TIMER to store the start time. � The timer is now set. � The TIMER remains on the display. ¶ At the preset time, the timer will be activated. � The selected source will be played. Notes: � During timer setting, if no button is pressed within 90 seconds, the system will exit timer setting mode automatically. � If the source selected is TUNER, the last tuned frequency will be switched on. � If the source selected is CD, playback will begin with the first track of the selected disc or programme. If the disc trays are empty, the TUNER will be selected instead. � The timer will not activate if a recording is in progress. To switch off the TIMER Press and hold CLOCK�TIMER for more than 2 seconds. Press � on the system to cancel the timer. � The timer is now switched off. � The display will show "OFF" and the TIMER disappears. To start the TIMER again (for the same preset time and source) Press and hold CLOCK�TIMER for more than 2 seconds. Press CLOCK�TIMER again to store the start time. � The timer is now on. � The TIMER appears on the display.
3
Sleep Timer (only on remote control)
This feature allows you to select a length of time after which the system will switch to the standby mode automatically.
E n g l i s h
1
2
Press SLEEP on the remote control repeatedly to select a period of time. � The selections are as follows (time in minutes): 15 � 30 � 45 � 60 � OFF � 15 � � "SLEEP XX" or "OFF" will be displayed. "XX" is the time in minutes. When you reach the desired length of time, stop pressing the SLEEP button. � The SLEEP display lights up. � The Sleep Timer is now set. Before the system switches to standby mode, a countdown of 10 seconds will be displayed. "SLEEP 10" � "SLEEP 9".... � "SLEEP 1" � "SLEEP"
1 2
While SLEEP mode is activated ¶ Press SLEEP once to view the remaining length of time. ¶ Press SLEEP twice to change the pre-selected period of time. � The display will show the remaining time followed by the sequence of sleep timer options. To switch off the Sleep Timer ¶ Press SLEEP repeatedly until "OFF" is displayed, or press the STANDBY-ON button.
1 2
24
pg 01-27/C100/21-Eng 24 29/05/2001, 09:57 AM 3139
115 20361
|
|
|
> |
|