|
|
|
Who's Online
There currently are 5904 guests online. |
|
Categories
|
|
Information
|
|
Featured Product
|
|
|
 |
|
|
There are currently no product reviews.
 ;
The service was great and the document was also great. Highly recommend!!!!
If anyone has a users manual... Please email me. need one. $ [email protected]
;
I needed a service manual as the display on my oscilloscope was very dim. I thought I'd give owner-manuals.com a try, as they advertised a huge number of manuals. Sure enough they had one listed. I bought it hoping it would be useful... actually, I bought it hoping it would be readable! I've had manuals from online sources in the past, and been very disappointed. Not this time! An excellent manual, complete, and very readable. Using it I fixed my 'scope, and as such the manual was an investment that paid off manyfold. Do I have any complaints? One very minor one - The circuit diagrams could have been scanned at a higher resolution, as some of the details were a little difficult to make out - not impossible, just not as easy as my old eyes would like! Overall, I'm very satisfied with my manual, and I will certainly be using this company again. Well done.
 ;
I Have looked for this manual for quiet a while now, I have finally found it here. I believe this is the only place they have them in a very nice scan, pages are very clear to read, some of the pages are a bit tilted but overall it is great to have this manual available for purchase. Thanks
;
This is quiet a rare manual, I Have looked for this manual for quiet a while now, I have finally found it here. I believe this is the only place they have them in a very nice scan, Excellent guide: very clear, enabling us to print readable diagram overall it is great to have this manual available for purchase. This is a complete service manual no pages are missing. Thanks
;
This SM is quiet scarce and hard to find it is an excellent Service manual, very clear to read and to print schematics and diagrams, Hi quality, Complete manual with no pages missing. I am very pleased with the manual and the fast service I have received. Great place to shop.
Good luck finding you manual...
EN 28
n g
Recording without automatic switch off
3.
HManualrecordi
ENGLISH
General
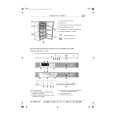
Which discs can I use for recording? With this recorder, you can record two types of DVD: 1 Switch on TV set and select programme number for the DVD DVD+RW recorder. This disc can be written to and then the contents deleted.
DVD+R
2 Insert a on which the recording to be made. This disc is then checked for content and system. READING' will appear on the display. This type of disc can only be recorded once.
If you want to play this in a DVD player it must be finalized using the 'Finalise disc' function. It is not possible to make further recordings using a Index display this disc. b A DVD+RW disc has been inserted that already contains recordings. Use CH+ A or CHB button to select point where the recording is If this disc is to played in a DVD recorder it must not be finalised. ? to start. Recordings can be added and deleted. The disc space (playback time) from the b The disc inserted is a blank DVD disc. a A dialog box appears asking whether you want to delete the
DVDR70 & DVDR75/0x1
deleted recording cannot be recovered for further recordings a The message 'EMPTYDISC' appears in the display
Use the 'Manual recording' function spontaneously start recording (e.g. to record a TV show contents or eject the disc already in progress). b The disc inserted is a DVD+RW but its contents are not DVD In 'index display' select the title to be overwritten or 'Empty title' with CHB , CH+ A . video-compatible (e.g. a data disc). Recordings on this disc can only be If you insert recordings between existing recordings, check lengths of the old and new made if entire disc is first deleted with the REC/OTR n button. recordings. If new is too long the subsequent recording (title/chapter) will be overwritten.
a The message 'Title limit' appears on the screen if a recording is to be made b A disc may contain a maximum of 48 titles (including blank titles). Delete
Problem titles or change the disc.
Insert new at the end of all existing recordings (Safe Record)
Directions For Use
down REC/OTR n button until message 'SAFE REC' appears on the switch to internal tuner in the DVD recorder. display.
3 If necessary, use MONITOR button on the remote control to To add a new at end of last recording on the disc, hold 4 Use CH+ A or CHB to select the programme number (station
For DVD+R discs each new recording is always added at the end of all name) you want to record. This will appear on the display: previous as existing recordings cannot be overwritten.
End of disc is reached
If end of a disc is reached during recording, recording will stop and the
Tip Programme numbers of the external inputs: Recorder will turn itself off automatically. 1 FREETITLE P01
'EXT1' Scart socket at the back EXT 1 TO TV-I/O 'EXT2' Scart socket at the back EXT 2 AUX-I/O 'CAM1' Front SVHS/audio sockets S-VIDEO / left AUDIO right 'CAM1' Front video/audio sockets A/V S-VIDEO / left AUDIO right Switching between the S-VIDEO and VIDEO sockets takes place automatically. If both sockets are in use, signal at the
Please refer section 'Recording without automatic switch off', if you want to manually start and stop your own recording.
If you want to start a recording manually but have it stopped automatically, read the section 'Recording with automatic switch off'. (e.g. not record to end of the disc)
Read the section 'Automatic from satellite receiver', if you want a recording S-VIDEO socket has priority. to be controlled automatically by a satellite receiver. 'CAM2' Digital Video (i Link) front socket DV IN Tip 5 To start recording, press REC/OTR n on the remote control or
Read the section 'Direct record' if you want to record a programme currently being shown. RECORD on the DVD recorder. If you want to start recording at end of the existing recordings, hold down REC/OTR n button until the message 'SAFE REC' appears on the display. For DVD+R discs each new recording is always added at the end of all previous as existing recordings cannot be overwritten. This will, for example, appear in the display:
45 46 Manual recording
|
|
|
> |
|